Thursday, August 20, 2015

I've moved! 

Please visit my new website at rcakewalk.com.

I will leave this blog active and the archives in place, but I have also transferred the content to my new home where I will update from now on.  

Walk on over!


Thursday, August 6, 2015

Review: Primo Preserves & Tapenade.

Earlier this summer, I was invited to try some handmade preserves from PRiMO.  I received the jars, and a charming handwritten note from the owner, and popped them into my china cupboard: excited to try them but waiting for just the right moment of inspiration to hit.

Primo.

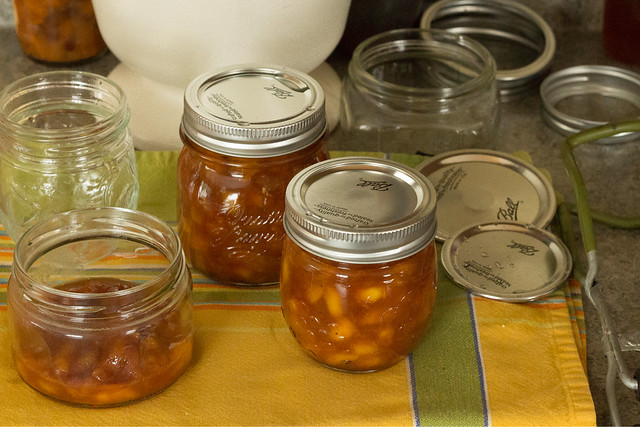
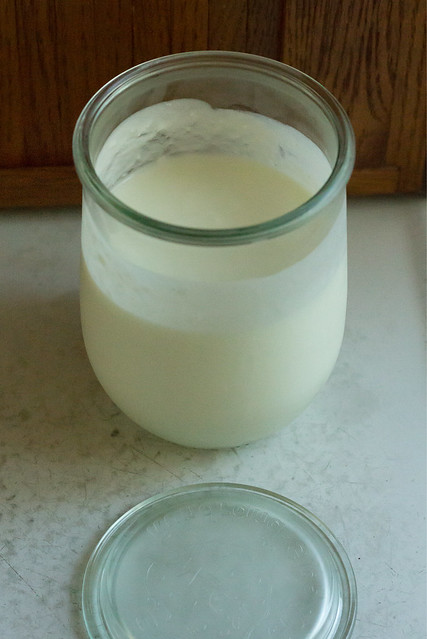
Days passed, I admired the jars.  I started the beginning of my own summer preserving, and tried to keep up with two active brothers who want nothing more than to be outdoors.  Last week, I had a bit of a break when my 9-year-old was away spending a week in the country with my Mom and Dad.  I have come to the conclusion that it is exhausting being interested in food when you have a picky eater.  I had 6 days where I didn't have to worry one bit about what we were going to eat for breakfast, lunch, and dinner and it was the best gift anyone could give me.  We ate leftovers and had a rare dinner out, and I put it on the top of my list to make these jars (or part of these jars anyway) into something special to showcase them.

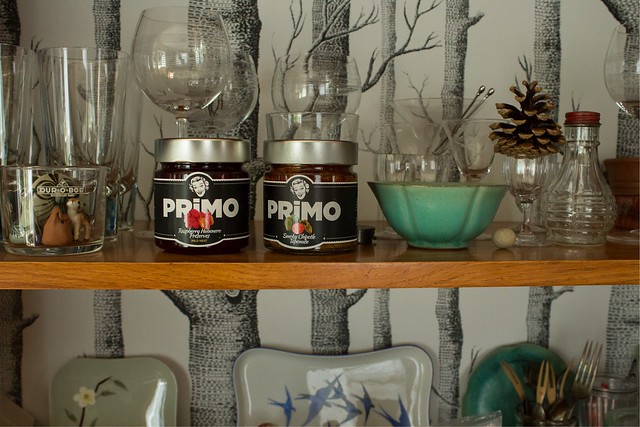
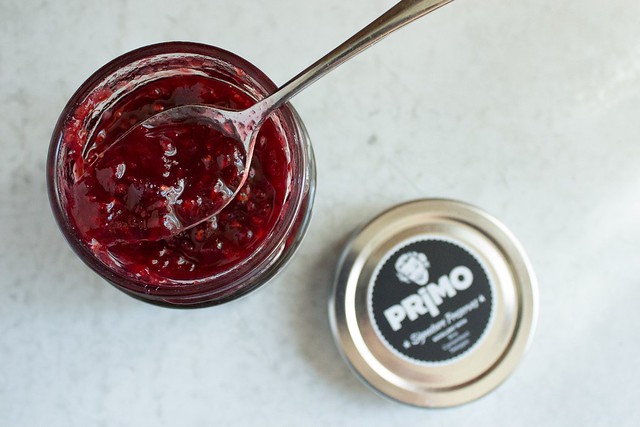
PRiMO is a small company in Denver, CO - and what first struck me was just how personable their PR person was.  It seems the whole company is just as down to Earth - and when I tasted their food, I could see why.  It's just like homemade, only with the convenience of not making it yourself.  I have to admit, when I was contacted I wondered why a specialty food company would want my meager opinion of their preserves!  I rarely purchase any jarred foods at all!  But with a single taste of the Raspberry-Habanero preserves, I knew why.  It's just really that good, and it tasted like I made it myself.  Anything sweet and spicy is right up my alley (remember my obsessions with Strawberry-Guajillo Jam and Candied Jalapenos?), and these were no exception.  But as a time-saver, a gift to mail-order, or just a special indulgence, I can absolutely recommend trying out the PRiMO line of preserves and tapenades.

Primo Raspberry Habanero Preserves.

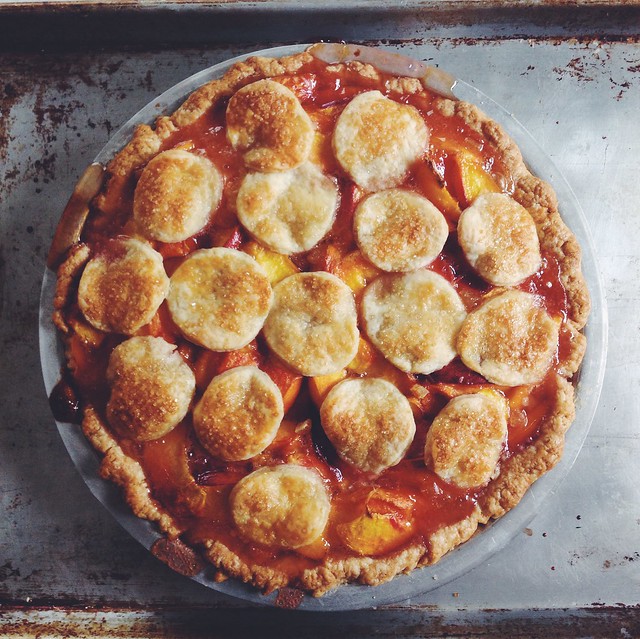
I decided to make a jam tart with the spicy raspberry preserves, like the pasta frolla based crostata I had made for a Daring Baker challenge 5 years ago.  (5 years!  Really?) When I cracked the jar to taste them, they were spicier than I thought (and I'm not complaining), so I quickly decided to alter the crostata to a cream cheese tart.  I briefly par-baked the pasta frolla dough in small tart shells and then filled and finished baking them.  I think they were a success - though I preferred them fresh from the oven than when they had aged in the fridge for a day or two... 

The pasta frolla dough really tastes very similar to a shortbread.  Any tart crust you like could easily stand in for it.  Should you make the pasta frolla, be sure to save the scraps and re-roll them into cookies (dock them with a fork first).  I baked a small dozen at the same time as the tarts, and enjoyed them alongside the morning coffee.

Raspberry-Habanero Cream Cheese Tarts
(4 4 1/2 inch tarts)

Pasta Frolla: (Simona at briciole)
  • 1/2 c. minus 1 tablespoon (100 g, 3 ½ oz) superfine sugar (I pulsed a half a dried vanilla bean with granulated sugar in the food pro)
  • 1 3/4 cup (235 g, 8 1/4 oz.) unbleached all-purpose flour
  • a heavy pinch of salt
  • grated zest of half a lemon
  • 8 T. (4 oz. / 115 g) cold, unsalted butter, cut into small pieces
  • 1 large egg and 1 large egg yolk, lightly beaten in a small bowl
Pulse the sugar, flour, salt, and zest in a food processor until combined.   Add the butter and pulse until the mixture is the texture of coarse meal.  Empty to a large bowl and form a "well" in the top.  (Basically, like how you would go about making homemade pasta.)  Add the eggs into the center and beat them with a fork, incorporating flour from around the edges until it gets too difficult to use the fork.  Switch to your hands, and gently knead the dough until it comes together into a ball.  Form the ball into a disc and wrap in cling film.  Let it rest in the fridge for at least 2 hours or overnight.

To parbake, preheat oven 400.  Roll the dough on a very lightly floured counter (or between plastic wrap or parchment) to about 1/8 inch thickness.  Drape onto the tart tins and reposition the dough so that it isn't stretching but fully covers the bottom and sides.  Press your fingers or the rolling pin across the top of the tins to remove the additional dough.  (Save the scraps to re-roll for cookies, or to add decoration to the tops of the tarts prior to baking.) Place the tart shells on a baking sheet and bake for 10-12 minutes until just barely browned.
  • 4 parbaked tart shells, bake them just long enough to set them and very lightly brown - recipe follows
  • 4 oz. (113g.) room temperature cream cheese
  • 2 eggs
  • 1/3 c. PRiMO Raspberry Habanero Preserves
After par-baking the tart shells, reduce the oven heat to 350.

Mix the cream cheese in a mediums sized bowl with a hand mixer until well blended.  Add the eggs, and mix well, then fold in the preserves by hand using a spatula.  Portion the mixture into the prebaked tart shells (bake any extra filling in a small ramekin alongside the tarts) and return to the oven.  Bake for 15-20 minutes until the filling is slightly puffed around the edges and set in the center.  

raspberry habanero cream cheese tarts.
I liked these best when they had barely cooled to room temperature, but they were still good when chilled overnight.

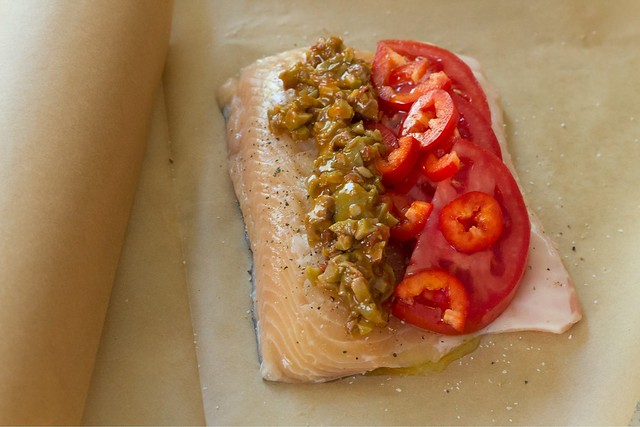
For the tapenade, I decided to find some nice looking fish and bake it in parchment.  One of my favorite, quick "go-to" recipes is some kind of white fish baked with olives, tomatoes, garlic, salt, pepper, fresh herbs, and olive oil - I think it was something I read in Gourmet years and years ago. If you are nervous of cooking fish (and I usually am, since I don't cook it as much as I like), put it in parchment and into a 450 degree oven for 10-12 minutes and it's perfect every time.  Using a pre-made tapenade like this one, with just a hint of spice, makes it all the easier.

Primo Chipotle Tapenade fish

You don't really need amounts for this recipe, just top fish fillets with ingredients in the proportion you like.  I'll estimate my amounts for the super intrepid...

Trout with Chipotle Tapenade, Tomatoes, & Sweet Peppers
3 servings
  • 3 fish fillets, I used lake trout, but any white fish will do
  • 1 large heirloom tomato, sliced about 1/4 inch thick
  • 2 sweet Italian red peppers, sliced about 1/8 inch thick
  • 2-3 T. PRiMO Spicy Chipotle Tapenade
  • drizzle of olive oil, salt & pepper
  • parchment paper
Preheat oven to 450.

Cut large sheets of parchment, and fold them in half (they should be large enough to encase the fillets with 1 inch to spare all the way around after they're folded), and cut them into hearts the way you used to make valentines in the 2nd grade (here's a good tutorial, and I swear, I thought about 2nd grade valentines before watching it!).  Arrange a fillet on each, and top with tomato, peppers, and the tapenade.  Fold the packet starting at the bottom edge and creasing incrementally on the way up around to the top.  Place packets on a baking sheet and bake for 10-12 minutes depending on the thickness of the fish.

fish in parchment

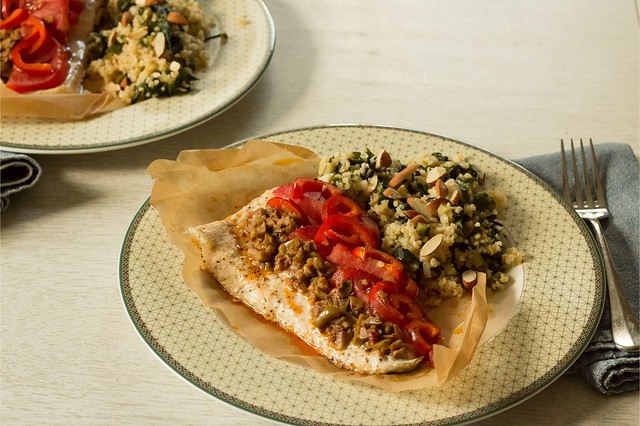
Alongside, I made one of the recipes from 
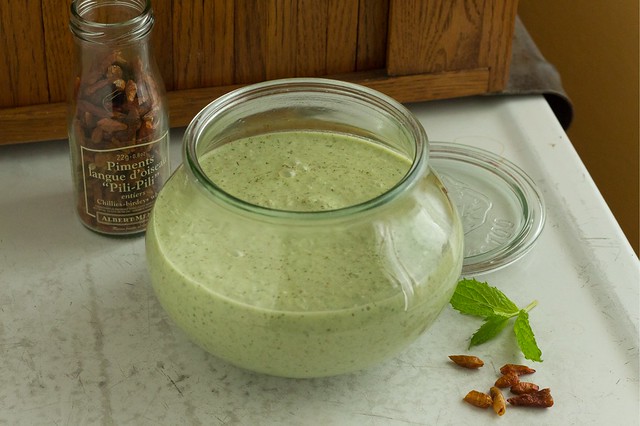
Maria Speck's excellent new book Simply Ancient Grains.  I have quite a lot of rainbow chard growing, and made just a half recipe of the saffron scented yogurt to top the bulgur salad she includes.  Our plates seemed so full, but the food wasn't heavy at all and best of all it was ready in a very short amount of time.

It was nice having some free time to get some projects out of the way - and this project of tasting and reviewing was definitely a highlight.  If you find yourself short on time, or just in need of a hostess (or personal) gift, look for PRiMO's line of handmade foodstuffs.   I thoroughly enjoyed them!


Disclosure:  PRiMO sent me the preserves and tapanade to try at no cost, but as always my honest thoughts and opinions are my own.

Friday, July 10, 2015

Diana Henry's Cucumber Yogurt Soup.

You might not believe that I've been meaning to write about this cold soup for more than a year.  It's been about that long since I first read about it in Diana Henry's book A Change of Appetite.  Last spring and summer I made it at least a dozen times, each time making it different and using the ingredients list as more of a suggestion.  As written, it is fantastic.  But it also is good using just about anything you have growing.

This soup is cold, and for someone who just can't quite warm up to chilled tomato based soups (I want to love them, I swear), this cucumber version I can't get enough of.  It's better if you can make it at least several hours before eating, and it improves with a day or two of refrigeration, and no one will judge you if you pour it into a pint glass and just drink it with a straw.  It makes good use of gracefully staling sourdough bread and nuts: Henry's original version uses walnuts, but pecans and almonds are both useful substitutes.  And someone out of yogurt could well use milk kefir, buttermilk, or sour cream as I have, all to good effect.  I've never actually made it with the rose petals, chicken stock, tarragon, or white balsamic -  instead a splash of floral rose flower water, dark balsamic or cider vinegar for a nuance of tang, and enough water to make it soup consistency.  Click above to see the original recipe, since I will list the way I make this cold cucumber yogurt soup, with some of the things I've substituted.

cucumber yogurt soup.

A Riff on Diana Henry's Cucumber Yogurt Soup

serves 4-8 (I often make this just for myself using one cucumber and the smaller amounts.  Use larger amounts for 2 cucumbers and more servings.  Add water to achieve the correct consistency.)
  • 1 or 2 cucumbers, unpeeled if English but peeled and seeded if a garden variety.
  • 1/2 - 1 cup walnuts, pecans, or almonds, toasting optional.  I also like adding chia seed on occasion.
  • 1 garlic clove.  Henry calls for 4, but I don't care for that much raw garlic.
  • scallions, walking onion, or any onion you enjoy raw, about 1/2 - 3/4 cup.
  • fresh dill if you're lucky, dried dill if you're me.
  • about 10-20 fresh mint leaves.
  • 4-8 dried  pili-pili chiles.  A friend gave me these chiles that are surprisingly hot.  Use any dried chile or chile flake you like.
  • a 2 inch slice (or larger) gracefully staling sourdough bread, most of the crust cut off, and torn into big pieces.
  • 1/2 - 1 cup yogurt, Greek or runny yogurt, buttermilk, kefir, sour cream all work well.
  • juice of 1/2 lemon.
  • at least 1/3 cup olive oil, more for a larger portion.
  • 1-2 T. vinegar of choice, balsamic, white wine, rice wine, apple cider - use something you like.
  • salt and pepper
The beauty of this soup is that it is all but made by tossing everything into the blender with very little prep work.  If you have a high-speed blender, this is especially fast; a conventional blender might take a little more coercion to reach the right consistency.  This soup is one that is best tasted several times while making and adding to your taste.  

I also like to stir in any number of garnishes before serving, including any of the above ingredients that you might save aside to include on top.  I also like hardboiled egg, baby garden greens, cherry tomatoes, thinly sliced radishes, or other things lurking in the fridge that might need using up.

cucumber yogurt soup.

This is the prettiest soup in person, with little flecks of bright green herb suspended in the mixture.  I try not to puree it silky smooth (which I could do in my Vitamix), but leave it with some texture that lets you know that there are both bread and nuts in it.  It truly is one of my favorite things, and a near perfect cold soup for hot weather.

Tuesday, June 30, 2015

Peachy.

If polled, I think most people would agree that there isn't much better in life than a perfectly ripe peach.  Maybe this is because a perfect peach is so fleeting, the window of perfect eating is gloriously small.  Both over and under ripe peaches have their place fortunately, but for that split instant of perfection, one might wait all year.

Because I was raised in a rural, northern Wisconsin, our peaches came in lugs from Michigan or Colorado.  My Mom canned quart upon quart to last us a whole year, something she still does and shares with me.  It's a lot of work for something that can disappear so quickly - those glass quarts of peaches seem to be everyone's favorite.  

I used to just drink the canned peach juice after the peaches were gone, but in the great sugar diet reduction of the past few years, I tried hard to be okay with just ditching it.  Then I realized that I could be extending it by boiling the peach juice with ample amounts of ginger and then using it to flavor seltzer or other drinks.  I simmer it for 10 minutes or so, with as much finely chopped ginger as I feel like, then let it cool and strain it through a nut milk bag.  The summer I worked a little at my friend's cafe, we added some ginger-centric chai concentrate to coffee and were pleasantly surprised (but it was never on the menu).  A touch in your coffee is a unique twist that you might end up liking!  For me it was a flavor combination that at first seemed weird, but then I all of a sudden craved.

peach ginger syrup.

As a kid, it might not have solely been my job to run down to the basement shelves to pick out a jam when we were out upstairs, but it seems like it was.  And it also seems like my Mom used certain jars for certain things.  I haven't asked her yet, but I feel like the peach jam was always canned in round jars - and I had totally forgotten about this until I was down in my own basement this week wrangling up half pints.  I made small batches of Marisa's Salted Peach Jam (recipe in Preserving by the Pint), and just 2 1/2 jars of the Peach-Sriracha Butter I can no longer live without.  I canned the jam in round jars.  And I thought all the while of how thankful I am for my Mom and her habit of providing me homemade peachy things for pretty much my whole life.

salted peach jam.

Isn't that was preserving for yourself, you family, and friends is all about?  Little glimpses into the past, to remember those days when you put the fruit into jars in the first place, a look back on my own childhood completely full of peanut butter and homemade jam sandwiches and who I ate those sandwiches with?  Peaches then are much more than a once a year luxury; they hold some deeply rooted history underneath their fuzzy exteriors...

Untitled

And speaking of fuzzy exteriors, I made a pie last week without peeling the peaches.  This was under advisement of the Bojon Gourmet (Alanna Taylor-Tobin), who is writing her first book.  Not peeling peaches for pie is a revelation, and I'm sold!  I also can hardly wait to see her finished book that will feature gluten-free baked goods.  It should be out next spring, and it's available for pre-order on Amazon.

The past several years, we've had a peach truck delivery at numerous locations in our area.  It's called Tree-Ripe Citrus, and you can find Midwest schedules and drop point locations here.  Their peaches come from Georgia, and are reliably good.  I split a case with my in-laws last Tuesday and Wednesday morning I came into the kitchen to find my eater baby had bitten into 6 of them.  Most likely, he was looking for the perfect peach because most of them were rock hard having just been picked.  He didn't yet know that he needed to wait and be patiently look them over twice daily, but maybe he somehow knew that in continuous trying he would find that perfect one.  The one to drip down all over him and the one that will start him on his way to his own memories of all things peachy.

peaches.

Friday, June 5, 2015

Food Update, Smoked Salmon & Ramp Tart.

Where does the time go?  I feel as if I barely look at the Internet anymore, rarely read the blogs that I once read voraciously and with total vigor.  I have slipped back into the old fashioned habit of cookbook reading from front to back (or did I never really abandon that notion?), devouring the written word the way God intended: inscribed into a tangible medium.

When I do have time to make the Internet rounds, I find that other people are likely as busy as I am.  A handful of people I checked up on recently haven't been posting in several months, perhaps now their blogs are even defunct.  Others are busy with other work and are posting less seldom.  It bothers me that I don't make the time to sit in the glow of the computer and update what has been going on in my own personal world of food - especially since I've feel so happy in my kitchen lately.

My kitchen was painted in late March, and when cleaning it out, (it was off limits for 5 days when ceilings/walls were repaired before painting) I reduced my clutter.  I was lucky to get a new fridge a couple weeks ago when my old one was keeping things at a balmy 60 degrees.  The new one is larger inside but almost seems smaller outside, and I took the opportunity to cleanse it of years old condiments: preserved kumquats from 2011? Imported capers packed in salt that expired in 2011?  Both were probably still fine to consume, but it feels so good to be lighter.  It feels so good not to re-clutter the fridge, enjoy the bright light through the new shelves when I open the doors.  The new fridge causes me to cook less, too. 

salmon ramp tart

What's that?  Cook less?  Probably because I am more in tune with the leftovers and I re-create things using them without needlessly making more.  Believe it or not, I notice a difference in my food budget too.  Being creative on what seems to be an empty fridge - but really it's never been more full.  I vow not to make more condiments before I actually run out this time.

Craving smoked salmon, I picked up an 8 oz. package a couple weeks ago and somehow decided on making Megan Gordon's smoked salmon tart with a remarkable cornmeal and millet crust.  It was so good I made it two weeks in a row, but adding more ramps than I did in the first rendition.  One thing I noticed this year above other years is just how long ramp season is.  Being a teacher caused me to spend more time outside and in the woods, and what I thought was really a fleeting 7-10 days of a season really stretches the better part of a month or more.  I spent the days of ramps well, but not overdoing it...  adding a single one here or there for a twist, eating really good soft cooked scrambled eggs with them butter-sauteed inside.

ramp ribbons.
ramps & onions

Maybe a month ago or longer already, I came across the TeamYogurt site after a friend pinned this brilliant Nutmeg Crunch.  I felt so out of the loop.  AND totally inspired to make heat-set yogurt again after a very long hiatus.  My room temp culture had conveniently just died, so I figured I didn't have much to lose using a store bought Greek yogurt as a culture.  I read an article on the National Center for Home Food Preservation site that recommended heating the milk to 200 degrees and holding it there for 20 minutes before cooling and then culturing for 7 hours.  I've streamlined my process now, and it doesn't take me all that long now that I've got the hang of it again.  I heat my milk to between 185-200 in a makeshift double boiler, hold it for 10 minutes, and then cool it rapidly (it only takes 5 minutes) by pouring the hot milk into the bowl I'll culture it in.  Then I sink that bowl into a larger bowl of ice water and stir it infrequently for 5 minutes.  It seems like a mess of bowls and timing, but it is easier done than said, and by the time I'm putting the cultured milk into the dehydrator to keep warm I'm nearly done with the clean up.

My yogurt has a gorgeous flavor now that it's several generations old - and a velvety buttermilk texture.  I used it in the salmon tart.

heat set yogurt

Megan Gordon wrote this recipe using creme fraiche, which is also easy to make, but in the spirit of using what I have I used the yogurt.  I love the texture of this tart so much.  It keeps well for a few days for lunches and the ratio is sound for pretty much any ingredient you would want to add.  Err on the shorter side of baking for a more custardy interior, but bake fully if you intend to pack for lunch or picnic.  And if you still spy a few ramps, by all means use them in their entirety.  The tart crust is just perfect.  With the additional of a couple tablespoons of confectioner's sugar, I really want to make it as a base for a lemon curd.  In my experience, you can never go wrong with millet!

I appreciated that her book Whole Grain Mornings was written in weights, and I made the crust using them.  Her conventional measurements are also below.  If you don't have ramps, make this with onions and add a clove or two of minced garlic with the onions of your choice.

Smoked Salmon & Ramp Tart (adapted from Megan Gordon)
serves 4-6 as a main course (with a salad)

for the crust:
  • 65 g. (1/2 c.) cornmeal
  • 90 g. (3/4 c.) white wheat or whole wheat flour (I used the Lonesome Stone Milling organic all-purpose)
  • 3/4 t. kosher salt
  • 85 g. (6 T.) cold butter, cut into bits
  • 3-4 T. ice water
  • 45 g. (1/4 c. millet) 
 Butter a 9 inch tart pan (or springform pan, like I used) well and set aside.  In a food processor, pulse the cornmeal, wheat flour, and salt together to blend.  Add bits of butter and pulse several one-second pulses until it resembles a coarse meal with bits of visible butter.  Add the ice water 1 tablespoon at a time and pulse until the dough starts to hold together when you pinch it.   Add the millet and pulse 2 times more to evenly distribute it.  Transfer it to the buttered pan and press it evenly into the bottom and up the sides.  Cover it, and place in the fridge to chill for 1 hour and up to a day.

for the tart:
  • olive oil
  • 4-5 ramps, leaves cut into thin ribbons and bulbs/stems finely chopped
  •  enough chopped onion to equal about 1/2 c. with the chopped ramps
  • 1 cup whole milk
  • 3 eggs
  • 1/4 c. yogurt
  • 1/2 t. dried dill (use a couple tablespoons of fresh if you have it) 
  • 1 t. kosher salt
  • black pepper to taste
  • 4 oz. smoked salmon, cut into small pieces
 After your crust has chilled and you're ready to bake your tart, preheat the oven to 375.  Remove the chilled tart base from the fridge and place on a sheet pan.  Pre-bake it for 15 minutes just to dry out the top a little bit.  Meanwhile saute the chopped ramps (reserve the leafy ribbons separately) and onions in a little olive oil until just wilted and soft - 5 minutes or so.  Beat the milk, eggs, and yogurt with the dill, salt, and pepper until well combined.  
Spread the onions evenly over pre-baked base , then scatter the salmon pieces over evenly.  Pour the eggy custard over the top and sprinkle with the ramp ribbons and more pepper if you think it needs it.  Bake in the center of the oven for 30-40 minutes, until the top is set and browned to your liking.


salmon ramp tart slice
This one is slightly underbaked to have a fluffier texture inside.  This one I baked more completely. (You can see that it almost has a cheesecake look about it, and it is pleasantly dense.)

This recipe is a keeper for so many reasons, the least of which is the absolute ease with which it comes together.  It looks complicated, and it's not.  It's the perfect all-in-one food.  It's vegetarian without being laden with cheese.  It's equally good for breakfast, lunch, or dinner.  It's exactly the type of thing that would fit nicely into the "Genius" category that I'm also so fond of lately.

Now that our school year is wrapping up, I'm looking forward to a little more online time, but I'm sure that our summer will be busier than ever.  There is a lot to cram into 3 short months of warm weather!  All the time I feel cursed by the convenience of the Internet.  I wonder if I could ever go back to the way things were in the 90's.  Conscious decisions not to be checking my phone/mail all the time are one thing, but I am not sure I could give up the convenience of the camera in my back pocket...